Git for Research

Version control for your research

Roi Meir

2026-02-08

Welcome - Git workshop for labmates

We’ll focus on a single code writer.

Today:

  • Why version control? (And why not just Drive or the cluster?)
  • Git basics: the daily workflow and key commands
  • Hands-on: we do it together on your machine
  • We’ll keep it simple and not technical today.

Why backup?

Why backup matters: Your code is a research output

  • Like your data, it can’t be easily restored if you lose it (laptop failure, theft, accidental overwrite).
  • Scripts, pipelines, and analysis code are irreplaceable.
  • Backing them up (e.g. push to GitHub/GitLab) gives you a safe copy and peace of mind.

Why backup matters

Why version control?

Importance of version control

  • Lost track of changes — Which script was the one that worked? Which draft had that result?
  • Naming chaosthesis_final_v2_FINAL.docx, analysis_old_backup.R
  • Can’t reproduce — What exactly changed between last week and today?
  • Goal: One place. Full history. Every change with a reason (commit message).

Experiment with code — see the difference

When you try things (new parameters, a different method, a refactor):

  • Git keeps a clear before (your last commit).
  • You can always see exactly what changedgit diff shows every line added or removed.
  • If the experiment goes wrong, you know precisely what to undo or revert to.
  • No more “what did I change?” — the diff is the answer. Small but important diff — e.g. a one-line fix or parameter change

Why not Drive / shared folder / cluster only?

Tool Limitation
Drive / Dropbox No real history — only “versions” and sync. Conflicts when two copies change. No “why” for each change.
Cluster / shared disk Same: no per-file history, no clear snapshots. You still end up with run_v1.sh, run_v2.sh.
Git History + messages for every snapshot. Works offline on your laptop, then sync to cluster or server. One workflow everywhere.

Why Git specifically?

  • Free, works on your laptop, cluster, and server
  • Standard in research and software — papers, code, data pipelines
  • Offline-first — Commit locally, push to GitHub/GitLab later for backup or sharing
  • Today we focus on you, one machine; remote/backup is at the end

What is Git?

Git = tool that keeps a history of changes in a folder (a repository).

  • Repository (repo) — The folder Git tracks
  • Commit — A saved snapshot + a message (who, when, why)
  • History — Chain of commits; you can compare or restore any point
  • Branch — A parallel line of work (try ideas without touching main)
  • Remote — copy on a server (backup or sharing)

Concepts in one picture

  commit A    commit B    commit C
     ● --------- ● --------- ●    ← main branch
                      \
                       ● --- ●   ← feature branch
                         D    E

Each ● is a snapshot. Branches let you try things without breaking the main line.

Setup (1/2) — Install Git

Check if Git is installed:

git --version

If not: git-scm.com — use default options.

Windows

Use “Git Bash” for the terminal in this workshop (same commands as Mac/Linux).

Setup (2/2) — Tell Git who you are

One-time per machine:

git config --global user.name "Your Name"
git config --global user.email "you@example.com"

Use the same email as on GitHub/GitLab if you use them.

New project: init or clone

Start from scratch (new folder, new repo):

cd my-project
git init

Start from an existing repo (e.g. GitHub, GitLab, a colleague’s copy):

git clone <url>   # e.g. https://github.com/user/repo.git
  • git init — Git starts tracking the current folder; you make the first commit.
  • git clone — You get a full copy (history included); you’re ready to work and push back if there’s a remote.

Basic workflow — The loop

Every time you finish a small, logical change:

  1. Stage — Choose what goes in the next snapshot: git add
  2. Commit — Save that snapshot with a message: git commit -m "message"
  3. Repeat.

Golden rule

You never commit without staging first. Stage (add) → Commit. Every time.

Basic workflow — Status and history

What you want Command
What changed? (files) git status
Short status git status -s
List of commits git log
One line per commit git log --oneline

Run git status often. It tells you what’s modified, staged, or untracked.

Tracked vs untracked — Reading git status

Tracked — Git already knows the file (it was in the last commit or you ran git add). Git shows changes: modified, staged, or clean.

Untracked — The file is in the folder but Git is not tracking it yet. It won’t be in the next commit until you git add it.

git status groups files into:

  • Changes to be committed (staged) — will be in the next commit
  • Changes not staged for commit — modified but not staged
  • Untracked files — not in the repo yet

Reading git status — Example

Example of git status output

Basic workflow — Stage and commit

What you do Command
Stage one file git add <filename>
Stage all changes git add .
Commit with message git commit -m "Add results for experiment 1"

Good messages: short, present tense, why (“Fix threshold in step 2” not “changes”).

Good commit messages — structure and why it matters

Structure:

  • Subject line — One short line (≈50 chars), imperative mood: “Add …”, “Fix …”, “Update …”.
  • Optional body — What changed and why; blank line after the subject. Use when the change needs context.

Why it matters: Good messages make git log readable. Future you (and collaborators) can understand and find changes without opening every commit. Bad messages (“fix”, “update”, “changes”) make history useless.

Tip: AI can help — paste your git diff and ask for a commit message, or use your editor’s AI to suggest one from the staged changes.

Basic workflow — Inspect and undo

What you want Command
See changes not yet staged git diff
See changes already staged git diff --staged
Discard changes in a file (careful!) git restore <file>
Unstage a file (keep changes) git restore --staged <file>

git diff = working copy vs last commit (or vs staged). Very useful before committing.

Basic workflow — Picture

  Working directory     Staging area        Repository (history)
  (your files)    →     (git add)     →     (git commit)
       edited                staged              snapshot

You edit → you add (stage) → you commit. History is only what you committed.

IDE integration — Why use it?

Same Git workflow — status, stage, commit — from your editor instead of the terminal.

  • See changed files and diffs at a glance
  • Stage, commit, and write messages in one place
  • Switch branches and push/pull from the UI
  • Fewer context switches when coding or writing

Today we practice in the terminal so you understand what the IDE is doing; then you can use either.

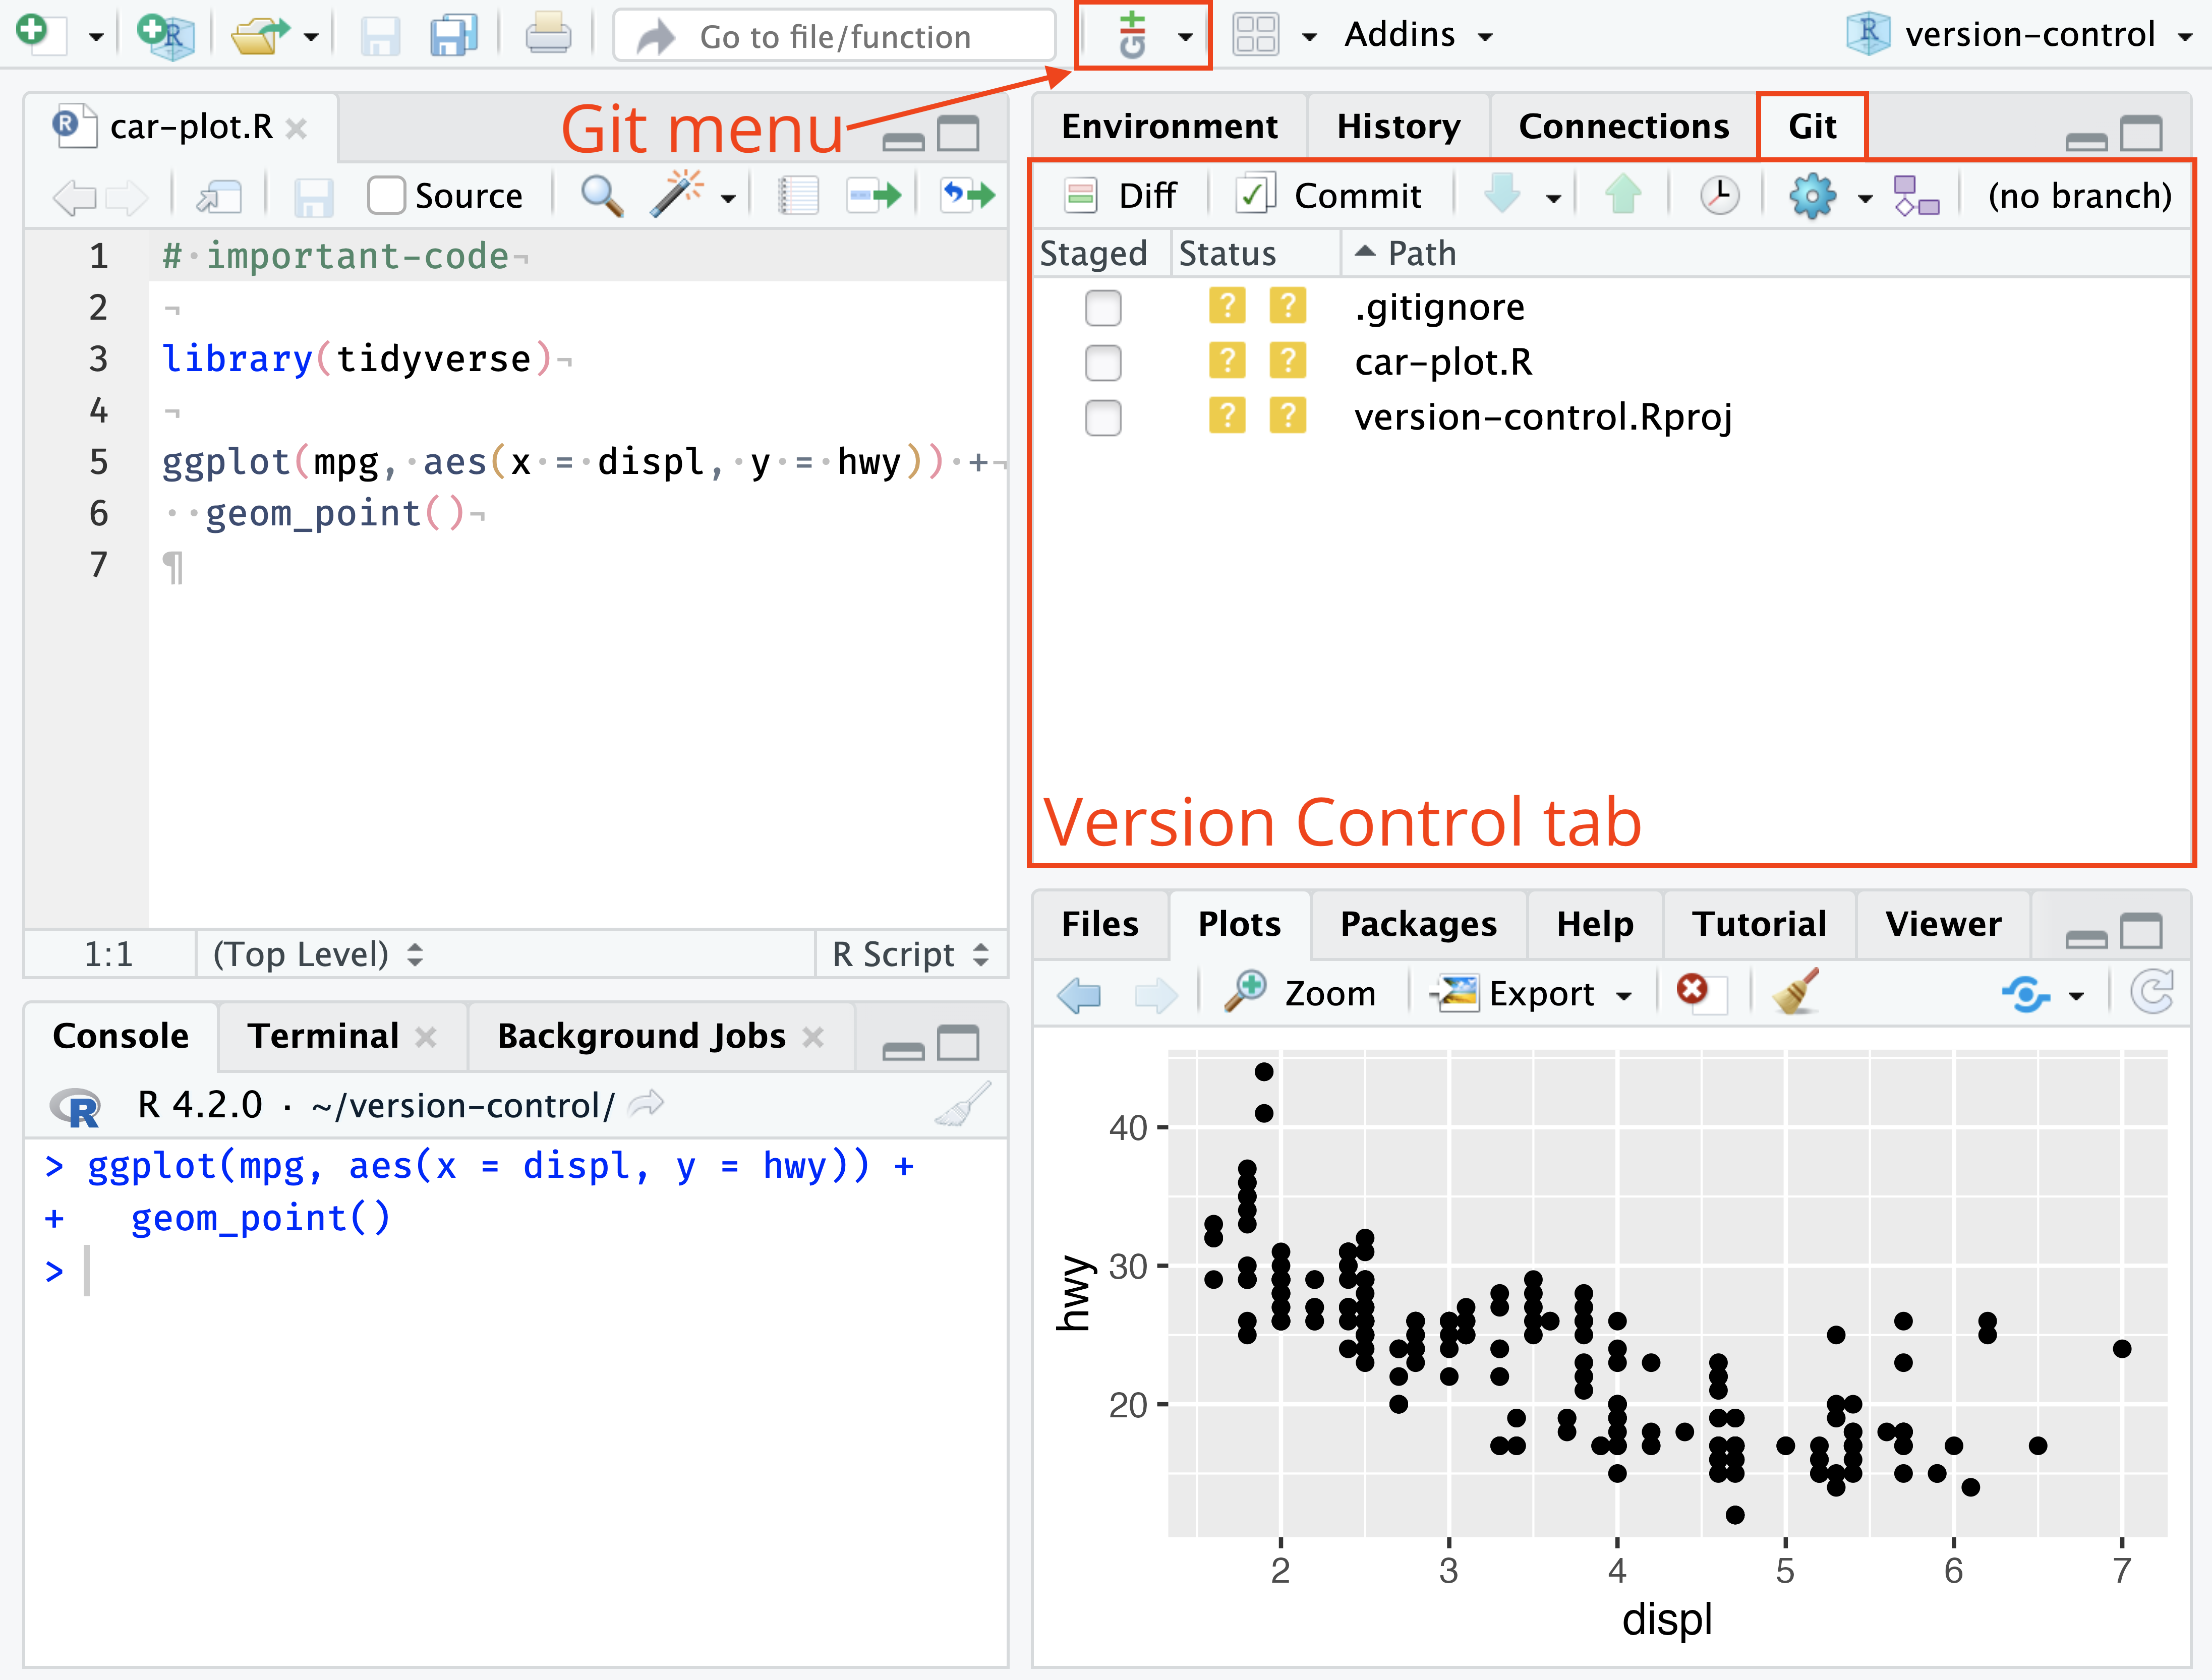
IDE integration — RStudio

Git pane (top-right when in a Git repo):

  • Status — Modified, staged, untracked files
  • Diff — Click a file to see changes
  • Stage — Checkbox or “Stage” button
  • Commit — Message box + “Commit” button
  • Branches — Dropdown to switch, create, merge
  • Push / Pull — Blue/green arrows (after remote)

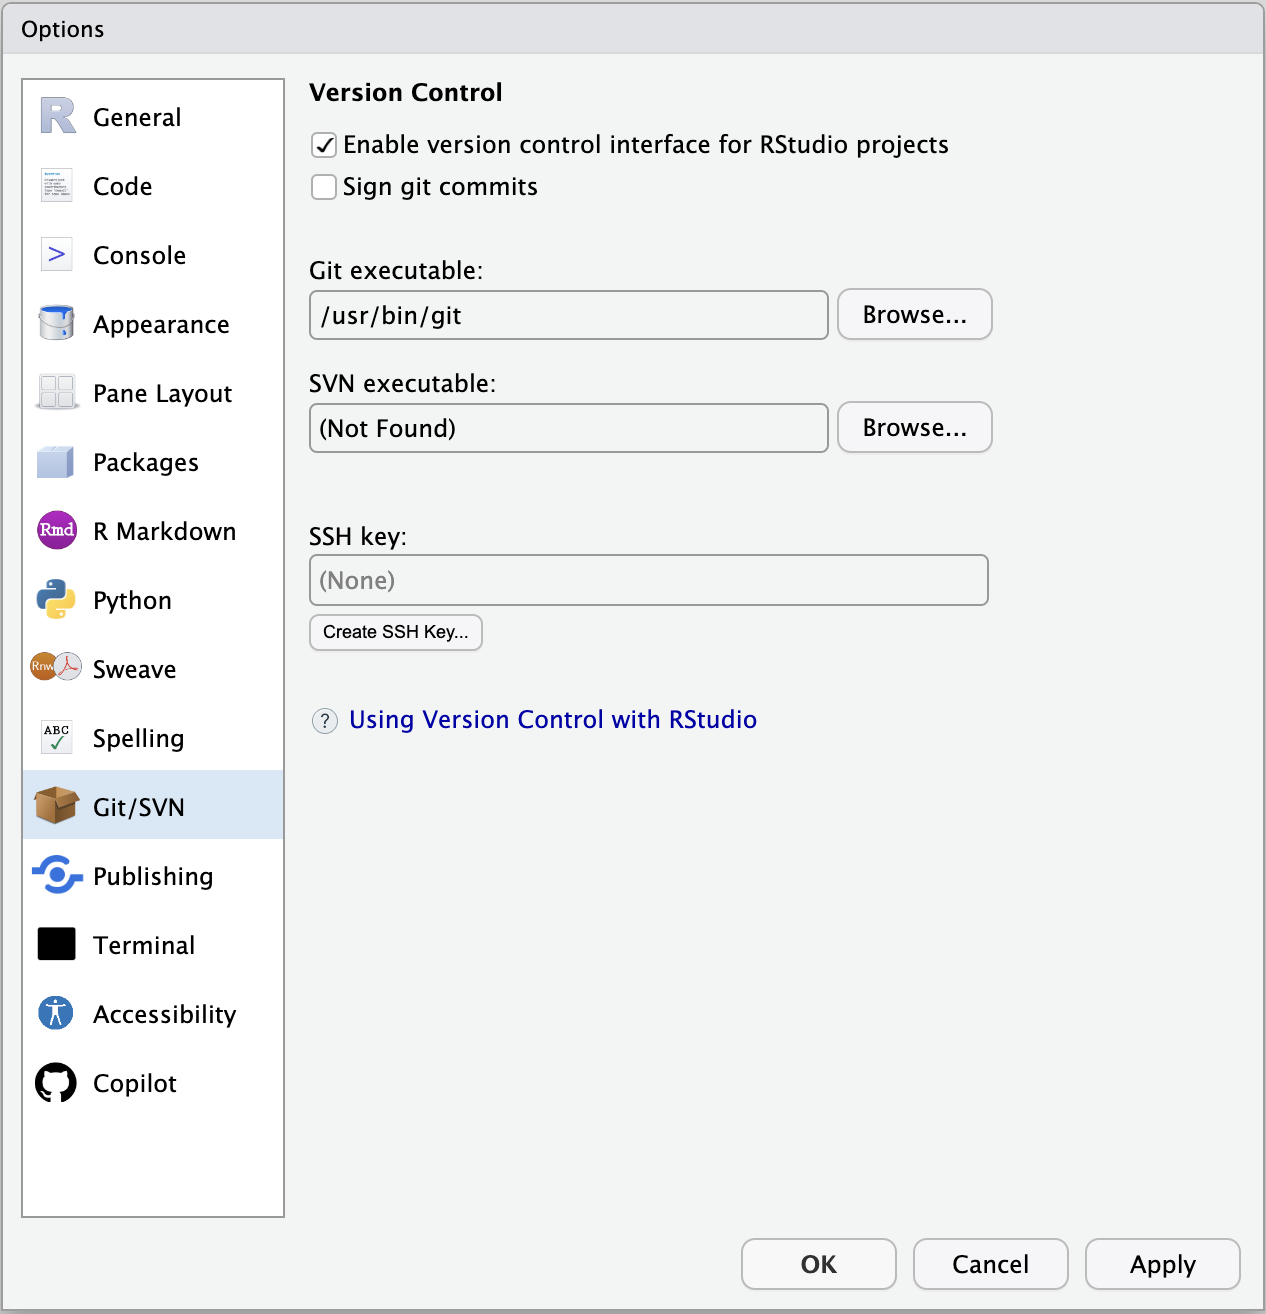
First time in RStudio

Tools → Global Options → Git: ensure “Git executable” points to your Git (e.g. /usr/bin/git). RStudio will use the same user.name / user.email as the terminal.

Tools → Global Options → Git

New project from Git: File → New Project → Version Control → Git; paste repo URL to clone.

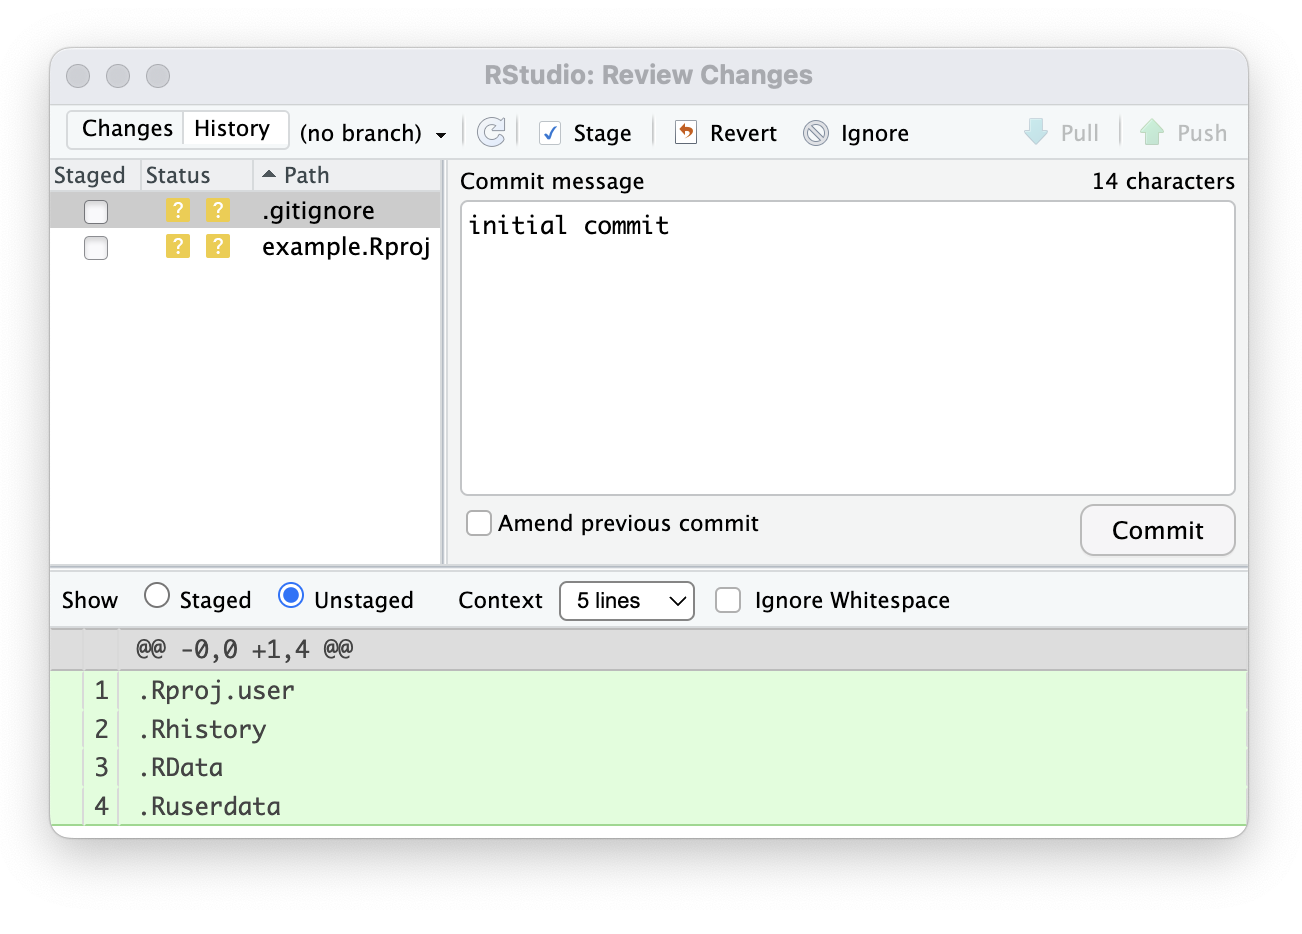
RStudio — Commit and Git options

RStudio Git pane

Commit pane — message and Commit button

IDE integration — VS Code

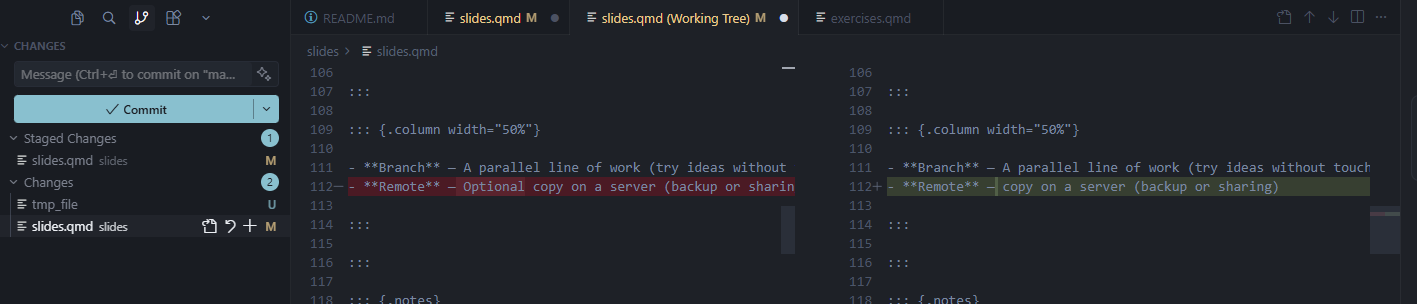
Source Control view (sidebar icon or Ctrl/Cmd+Shift+G):

  • Changes — List of modified/untracked files; click for diff
  • Stage — “+” next to file or “Stage All Changes”
  • Message — Box at top; Commit button (checkmark)
  • Branches — Bottom-left status bar: current branch; click to switch/create
  • Sync — Push/pull via status bar or “…” menu in Source Control

First time in VS Code

Install the built-in Git support (usually already active). For GitHub: “GitHub Pull Requests and Issues” extension. Git uses your system Git and config (user.name / user.email).

Clone repo: Ctrl/Cmd+Shift+P → “Git: Clone” → paste URL → choose folder.

IDE integration — VS Code (screenshot)

VS Code Source Control / Git pane

Branches (short)

  • Create and switch: git switch -c my-feature
  • Switch back: git switch main
  • Merge into current: git merge my-feature

Branches let you try ideas without touching the main line. We’ll try this in the workshop.

Remote & backup

When you want a copy on a server (GitHub/GitLab) — for backup or later sharing:

  • Add remote: git remote add origin <url>
  • Push your branch: git push -u origin main
  • Pull (if you use the same repo from another machine): git pull

Today we focus on local workflow; remote is one short exercise at the end if time.

.gitignore — Keep noise and secrets out

A .gitignore file in the repo root tells Git which files or folders not to track.

Why: Avoid committing build outputs, large data, secrets, IDE/OS junk — and keep git status clean.

Example (e.g. for R/Python + data):

# Data and outputs (large or machine-specific)
data/
outputs/
*.csv

# R
.Rproj.user
*.Rdata

# Python
__pycache__/
*.pyc
.env

# OS / editor
.DS_Store
*.swp

Git will ignore these even if they’re in the folder. Add .gitignore early and commit it.

  • Generate templates: gitignore.io — create useful .gitignore files for your project (OS, IDEs, languages).

Hands-on: switch to the workshop

Open workshop/exercises.html (or the workshop/exercises.qmd source).

We’ll do in order:

  1. Setup check
  2. First repo + first commit
  3. Basic workflow again (status, diff, add, commit)
  4. Branches
  5. Remote + push (for backup and sharing)

Wrap-up

  • Git = version history for a folder; commit = snapshot with a message; workflow: statusaddcommit.
  • Key commands: git status, git add, git commit -m "...", git log / git diff; branches and remote when you need them.
  • Next steps: Use Git for one real project (code or paper); add a remote for backup or sharing.

Take-home message

Start small. Pick one project, commit at the end of the day, and move from there.

Advanced topics (next steps)

Things to learn when you’re ready:

  • Merge — Bring a branch into another (git merge); fast-forward vs merge commit.
  • Pull request (PR) — Propose changes on GitHub/GitLab; review, discuss, then merge.
  • Stash — Save uncommitted work temporarily (git stash / git stash pop); switch context without committing.
  • Conflicts — When two branches change the same lines; resolve in the editor, then git add and finish merge/rebase.
  • Tags — Mark a point in history (e.g. a release): git tag paper-initial-submission.
  • Bisect — Find the commit that introduced a bug: git bisect start / good / bad; Git binary-searches history.

Resources: git-scm.com/book, GitHub Docs

Thank you — Questions?

Any questions? We can redo any exercise or go deeper on workflow or branches.

You’re always welcome to ask me anything in the future.